See end of this article for UPDATES!
This is a temporary post to gauge interest in this form of illumination. I emphasize that this is a ‘work in progress’ and that I am happy to acknowledge that it isn’t a substitute for an Abbe condenser though it can produce some very interesting patterns of illumination both steady and that can change with with time – more on the latter at a later date. The main limitation is that NeoPixel LEDs are not very bright – particularly when used to provide oblique lighting. Each NeoPixel draws up to 60mA at 5V when set to ‘white’ at maximum brightness. However, to use them at high currents will cause them to heat up significantly – thus, I have used them at limited power and have the facility to switch them off if I feel they may overheat. Further, there are some other limitations both optical and ‘dimensional’ but I don’t think they should inhibit experiment.
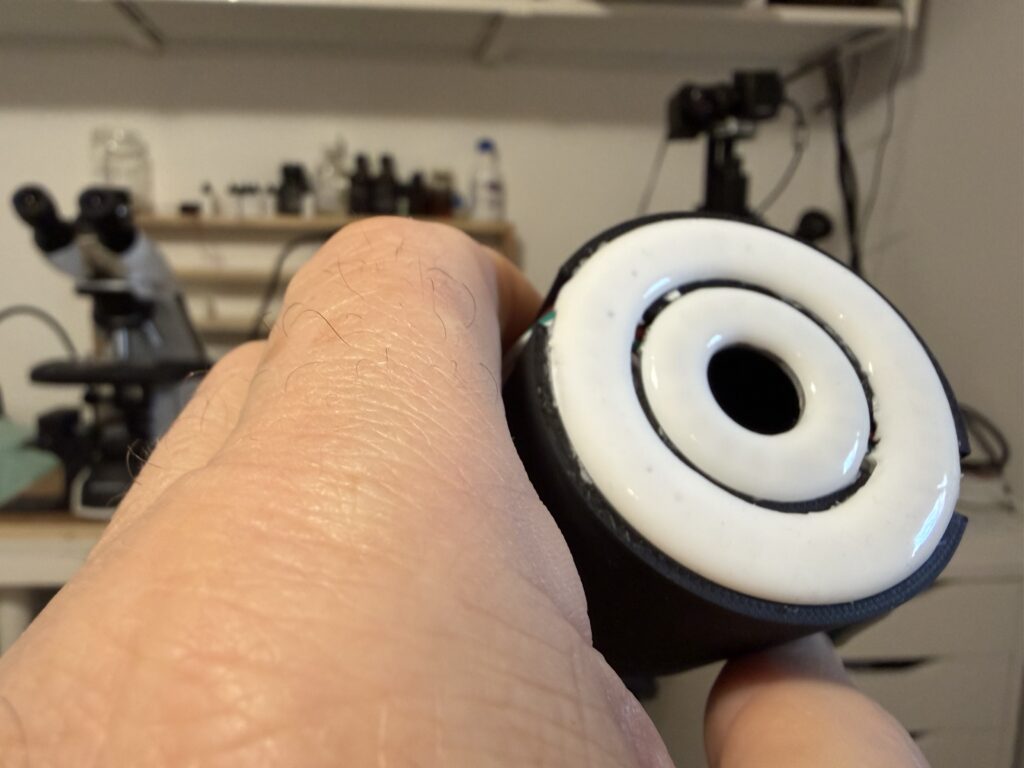
The ‘LuciLED’ illuminator described here uses two WS2812B NeoPixel components – the first is a ring of 18 NeoPixels embedded in a pearl-white plastic diffuser. This form of ring has the advantage of having a high pixel density in a small form-factor. The ring is 27mm in diameter with a central hole of ~12mm in diameter. The second NeoPixel component is not a ring but rather a circular PCB ~17mm in diameter with 3 NeoPixel LEDs arranged in a triangle.
The main ‘mechanical’ components consist of two 3d-printed tubes. The outer one carries the dovetail and a flange to enable it to be mounted in a condenser-holder. The centre of the tube is hollow and the top carries a recess designed to take the 18 LED NeoPixel ring. The second narrower tube is a friction fit to the hollow centre of the larger tube. It house the PCB that carries 3 NeoPixels.
There are two other components: a white ‘reflector-spacer’ tube that sits above the 3 LED PCB that retains it against the lower tube and finally, a circular piece of opaque plastic (diffuser) that sits above the LED PCB (not shown). The centre works a little like the Zeiss Lucigen condenser (that may be to flatter my crude setup!).
A picture is worth a thousand words – below are pictures of the complete LED/mechanical assembly along with one of all the separate parts. It is important to note that the central components are set up such that the circular diffuser sits a few millimetres below the outer LED ring. If this is not done, light will reflect from the diffuser and cause unintentional illumination of the central zone.
The NeoPixels are controlled from an Arduino Uno R3. The program treats the outer ring of pixels and the central three as a single strip. It allows for any pixel to be set to any colour and exploits the fact that until a particular LED is set to a new colour, it retains the existing one. Thus, it is possible to light all 18 outer pixels to say green and the inner 3 to red then, if the first 9 pixels are set to say blue, pixels 10 to 18 will will remain green and similarly, the centre 3 (19-21) will remain red. It is easy to setup oblique, Rheinberg etc. – indeed, the possibilities and colours are virtually limitless. I believe it should be possible as others have done with ‘Angel Eyes’, to use it for phase contrast. It is also an option to animate the ring and have the colours shift and change however one might want – this is not enabled by my current program but I have some ‘beta’ code that sort of works (!) and I can see that such animated patterns of illumination could be useful.
The control box for the LEDs consists of the Uno, a 5 button keypad and a 4-line I2C LCD screen. The Arduino and the power for the LEDs are provided separately because the Arduino cannot supply sufficient current from its 5V pin. The 3d printed control box is shown below. The Arduino, button pad and LCD were chosen because I had them lying around – I plan to replace the button pad arrangement with something more sophisticated but the current set up works well enough.
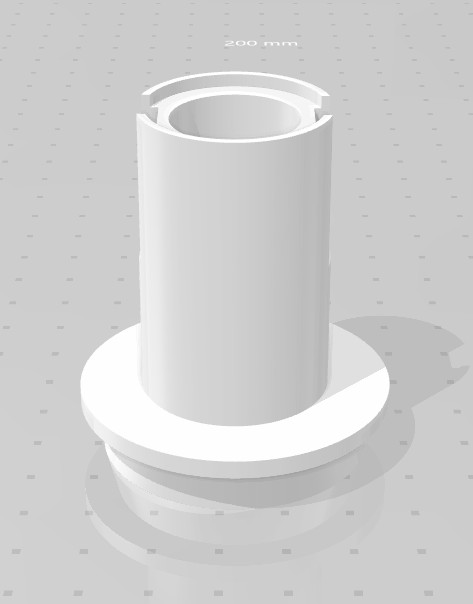
The outer tube that carries the 18 LED ring. This one has a flange and dovetail to mount it to my Bresser Infinity microscope.
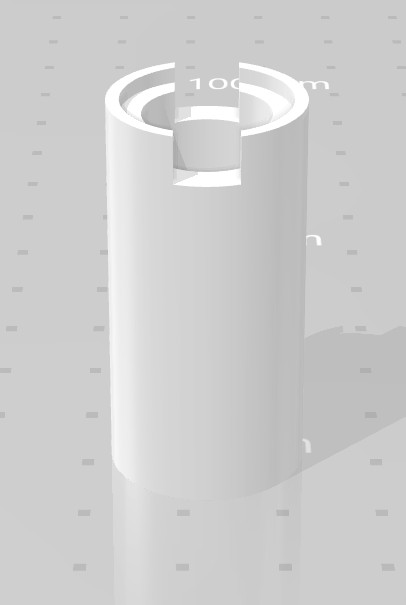
The central tube that slides into the outer one and that carries the 3 NeoPIxel PCB. The fit is tight enough that nothing is required to retain it.
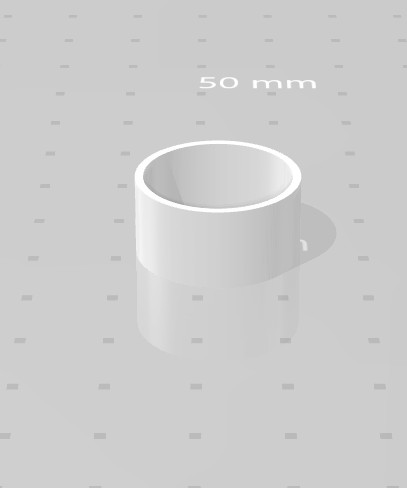
The retaining ring/reflector printed in white that holds the PCB in place and that spaces it from the diffuser.
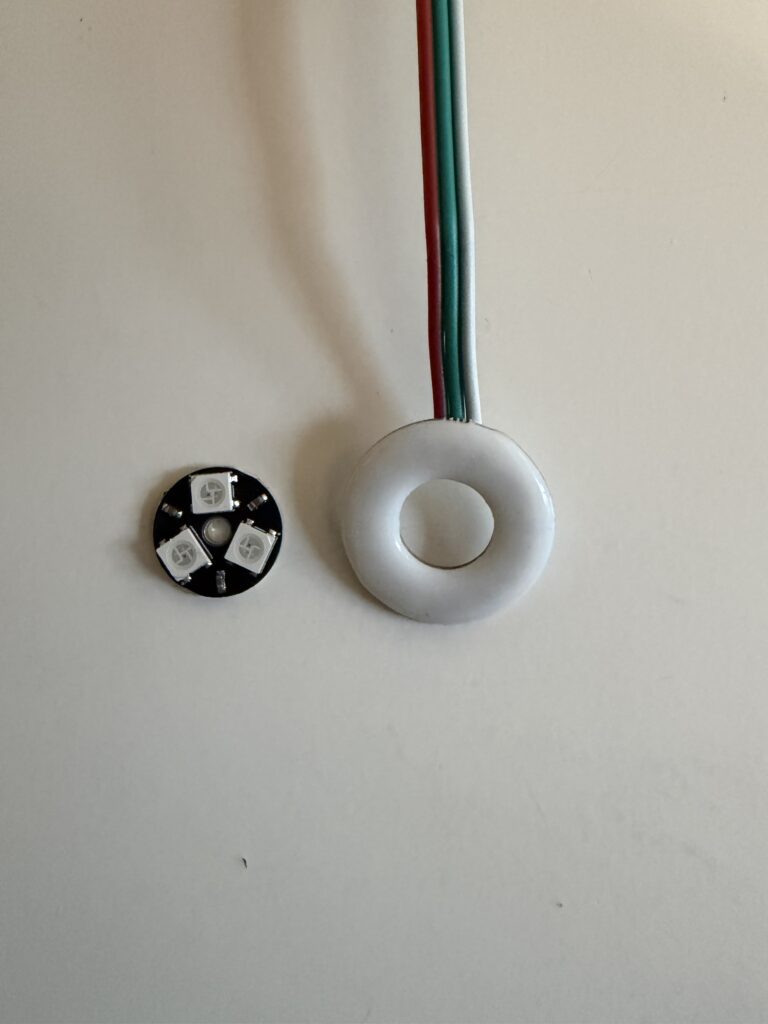
The two NeoPixel components.
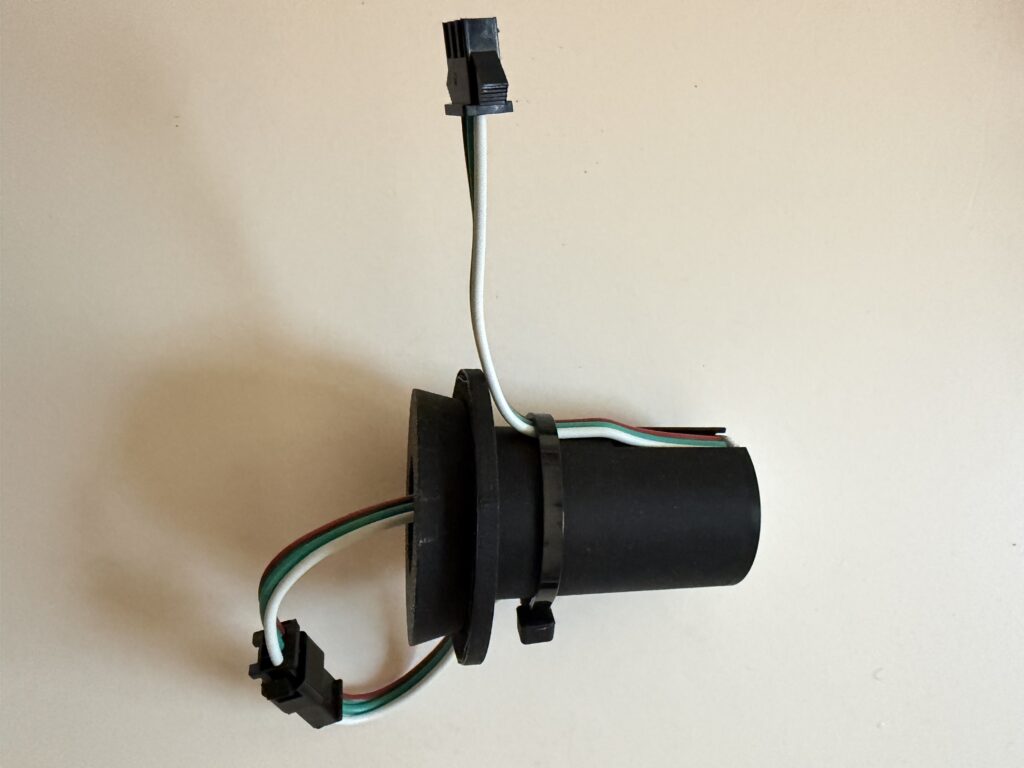
The completed LuciLED illuminator. Note that the two NeoPixel components have to be connected to together and work as a single strip.
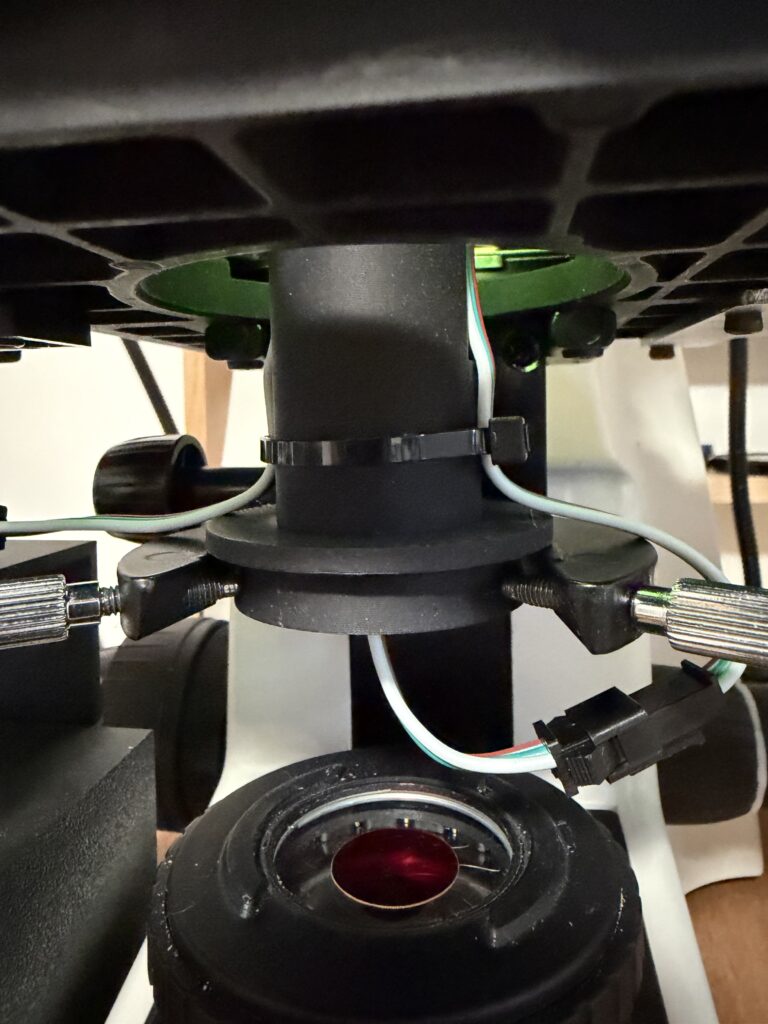
The LuciLED illuminator in place on the Bresser. Disregard the red filter on the field glass!
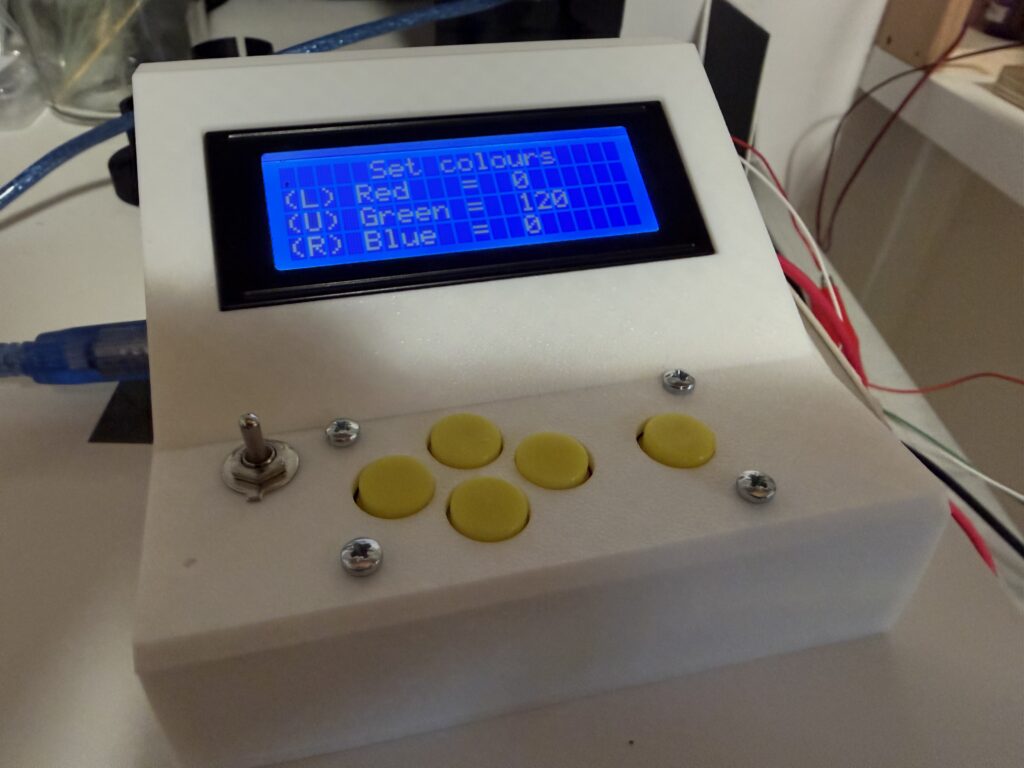
The control box that runs everything. This and the LEDs are powered from a lab psu but the power to the LEDs is separate to that to the Arduino Uno.
If there is any interest in this project then I will provide the stl files for all the components, a wiring diagram for the control box, the C++ program that provides for lighting with any pattern or colour, a more detailed description of how to assemble everything and a bill of materials. Incidentally, the program could be used with any NeoPixel strip and may be useful in other situations such as when the strips are used in epi-illuminators.
Finally, I have not given any references here to those who have built Angel-eye type illuminators. They deserve much credit and I will provide a proper reference list in an extension of this preliminary article. I am sure that I am not the first to use NeoPixels – if you know of other NeoPixel-based illuminators designed to substitute for the sub-stage condenser of a compound microscope, let me know.
Do let me know if you think this post is of any interest.
There remains only to show some of the results that can be obtained:
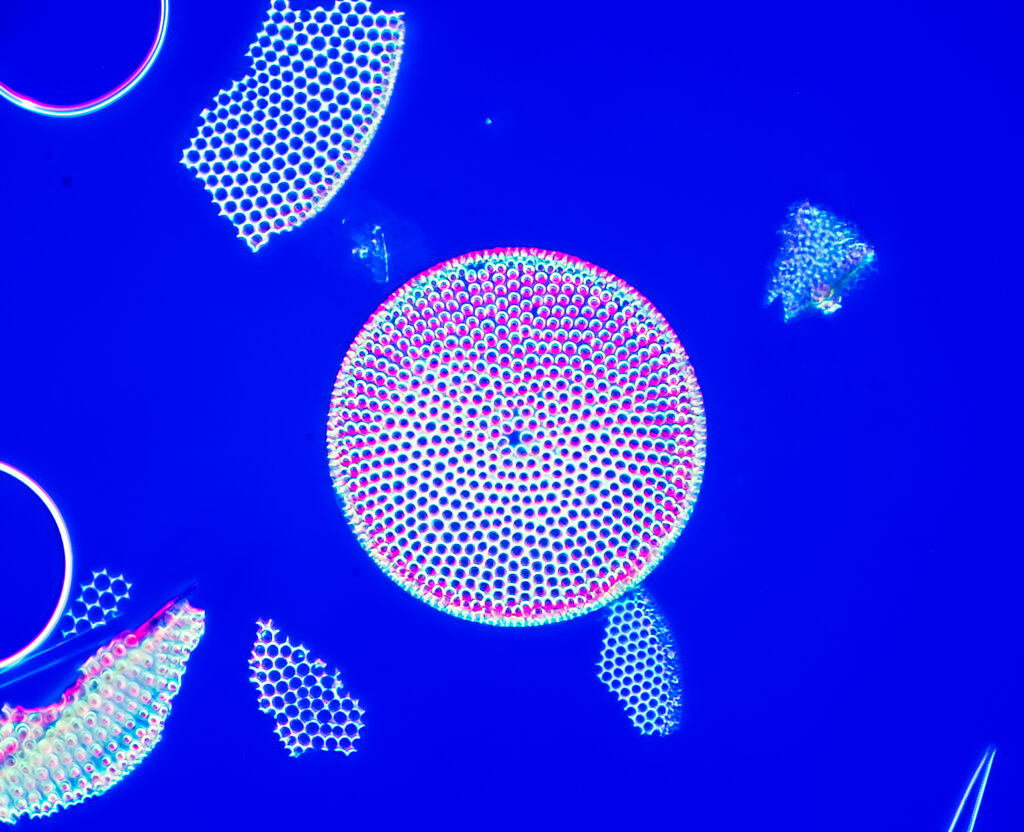
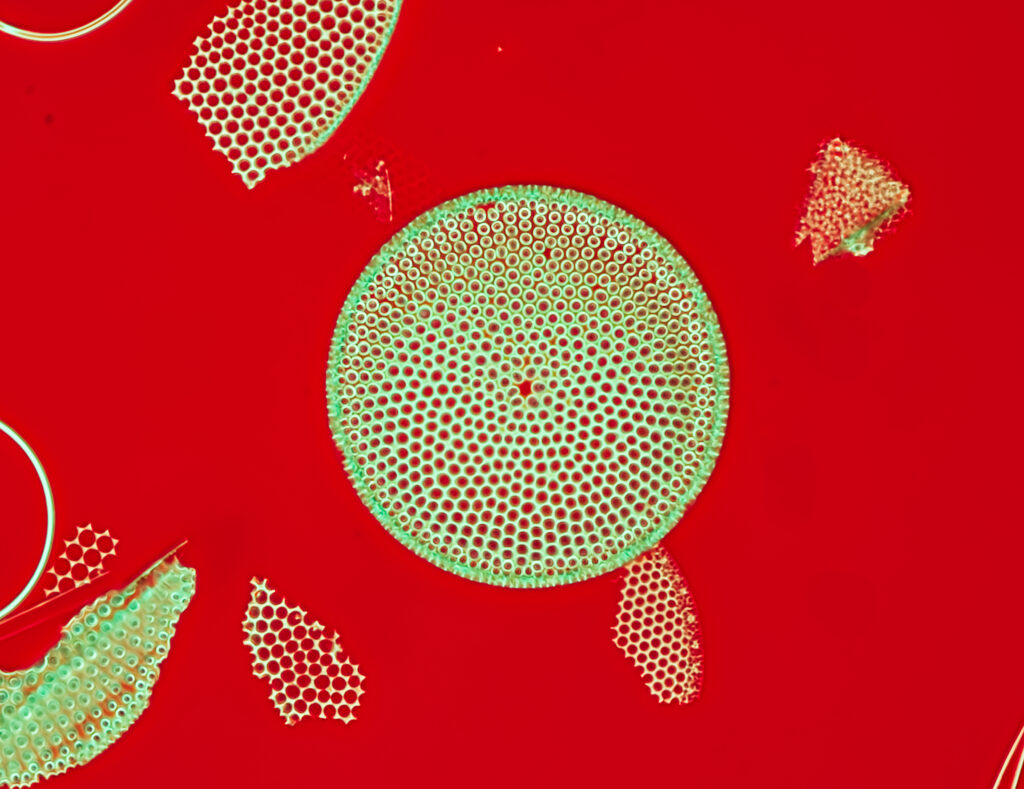
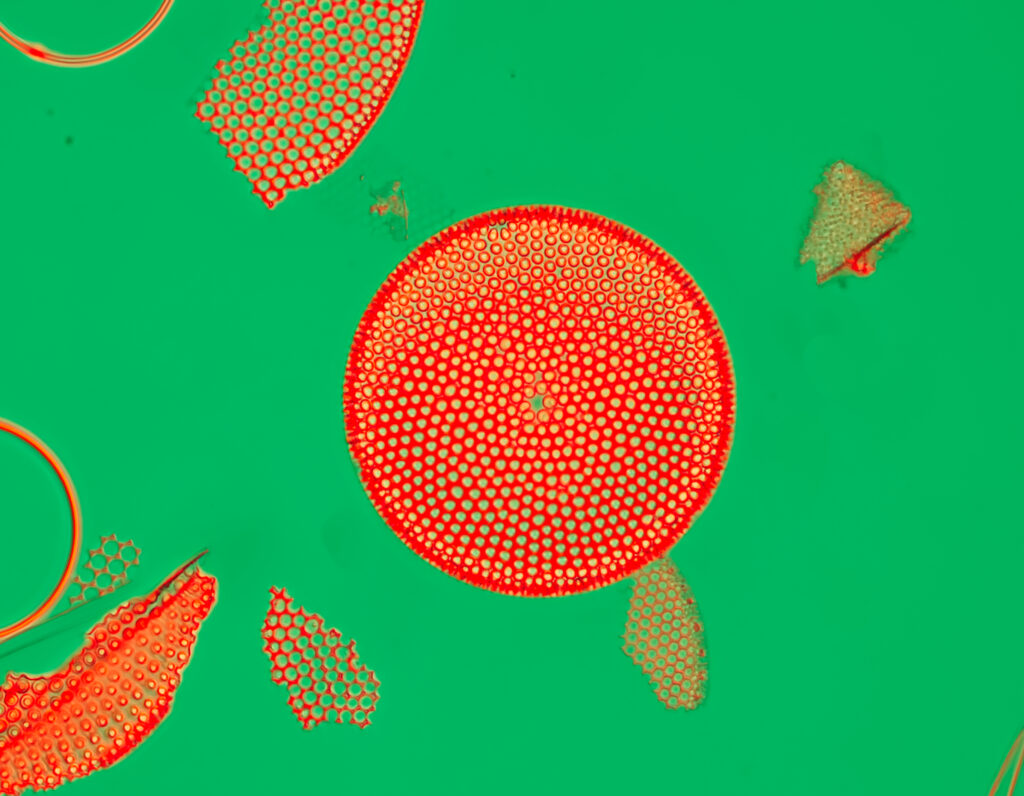

Fossil diatoms from a lake in Japan. These results were obtained with the Bresser 40X dry achromat objective – not the best lens! The illuminator works with NAs up to 1.0. I have yet to try higher values. Each image is a stack of 5 or more images. I have kept the post-processing of the RAW files to a minimum.
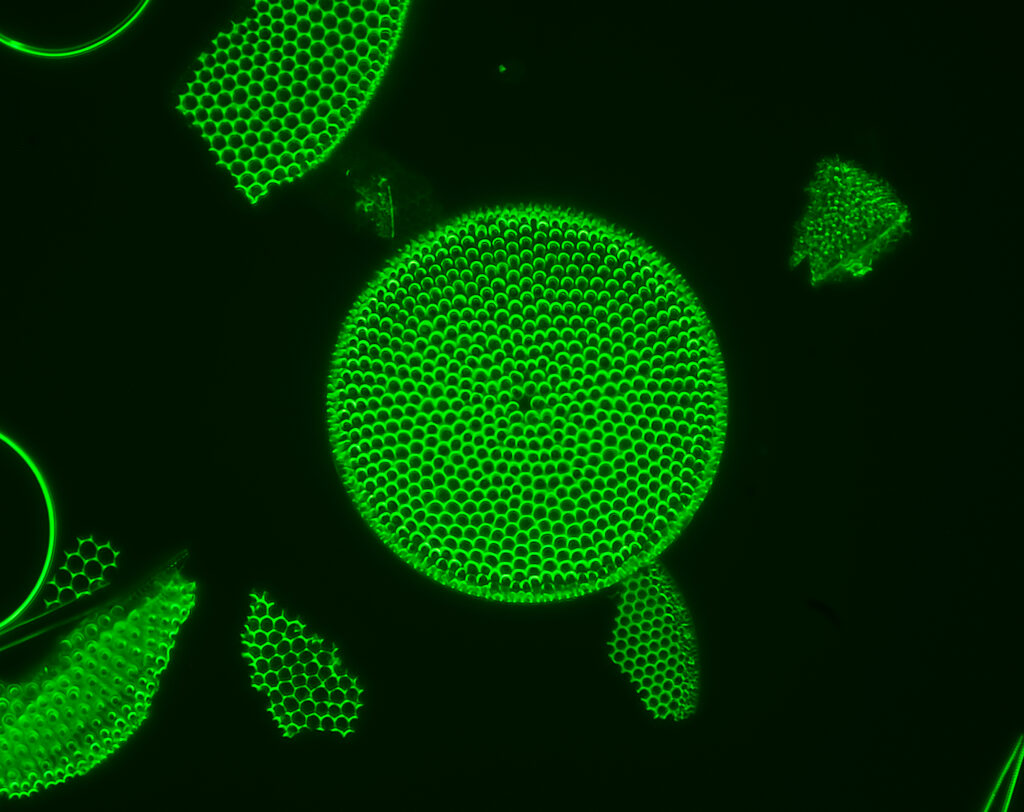
This is perhaps frivolous but because the NeoPixels are addressable you can do things like this:
UPDATE: I have continued to develop the LuciLED illuminator for condenser-less microscopy. Thanks to a gift of some larger ‘angel-eye’ LED rings from Carel Sartory, I was able to investigate whether or not larger NeoPixel rings would perhaps give better results than their smaller counterparts. My results showed that darker backgrounds were to be had from the larger rings when used with lower NA (usually lower magnification) objectives. However, using the larger rings one lost some of the effects available with the smaller ones. The answer was to have an illuminator with both. The prototype for this can be seen in the figure below. Because the illuminator now has a total of 57 LEDs, 36 in the outer ring, 18 in the inner ring and 3 in the Lucigen-style core) I had to change the graphics interface used to control them. The Nextion/Arduino-based controller now lights the rings in quadrants that can be of any colour and brightness. The control of individual pixels would have been very cumbersome and little if anything has been lost by moving to lighting the rings in quadrants. The resulting illuminator can provide dark-field, Rheinberg, COL, oblique and bright-field lighting with all my ‘dry’ microscope lenses – the Bresser Infinity with only non-oil immersion plan-achromatic lenses – X4 NA0.1, X10 NA 0.25, X20 NA 0.4, X40 NA0.65. It *sort of works* with my semi-apochromatic X60 NA 0.85 objective but the results are not to my liking. I know from another of my LuciLED illuminators that the system can work with objectives with NA s closer to 1.0. Unfortunately, because the NeoPixel rings are only available in a limited range of diameters compromises have to be made with respect to which objectives one wants the system to work with. The inner ring has multiple uses in that it can be used to provide a bigger Rheinberg centre, COL and oblique where the larger ring does not work as well. There is a spectacular range of variations to be had and there is no space to describe them here (see https://www.youtube.com/watch?v=aWyT4FbiOxo – there is some clumsy editing out of a bright object to the left of the field in this video – sorry!) for what a single ring can do – a new video with both rings when time permits!).

Leave a Reply