Some insects are so small it becomes very hard to photograph them with traditional macro lenses and even though my Loawa macro lens goes up to 5X magnification, unless the subject obligingly sits absolutely still, and even if you haven’t drunk too much coffee, at such high power it is very difficult to use on living specimens. Further, while macro photos allow amazing views of the intricacies of small insects many of their features become visible only when they are rendered transparent and viewed under a microscope. While I am a beginner at mounting small insects for microscopic observation, below is a summary of what I have discovered so far.
Most insects are opaque and you cannot see any of the details of their internal structure and many of the external features are just too small for any camera-mounted macro lens to resolve. Fortunately, way back in the days of the Victorian microscopists a way was found to render dark insect cuticle transparent. The most basic technique involves fixation in 70% alcohol – you can keep insects in this solution for months or even years; the minimum period depends on size but to be on the safe side, I keep even small insects in it for at least a few hours. The subject can then be re-hydrated through graded alcohols until they are in water. After this, I put them in 10%w/v sodium hydroxide solution heated to 50oC. Again, the time it takes for the insects to bleach depends on their size and how dark the cuticle is. However, I found that insects the size of mosquitoes take about 6 hours to become fully transparent – if the abdomens are full of blood this needs to be squeezed out with the tip of a pin otherwise it will remain opaque. After this treatment, the specimen is thoroughly rinsed in distilled water to which a couple of drops of acetic acid have been added. They can then be dehydrated and mounted.
I have seen a mounting technique in which insects are flattened and processed between two slides. I thought about using this technique but was concerned that too much would be lost in terms of the 3D structure. Instead of flattening the specimens, I have used image stacking techniques to generate pictures that render the entire insect in focus. I find that I can still see the three dimensional relationship between body parts which I do not think would have survived clamping between two microscope slides.
A variety of mountants are available; Canada balsam, gum Dammar, Euparal etc. More recently, Liquid Optically Clear Adhesive (LOCA) has become poplular. LOCA is the glue used to stick the glass to the displays found in mobile phones. I tried mounting specimens in LOCA and this worked OK but care has to be taken to drive off every trace of alcohol. In order to do this, I heated the specimens to 50oC in a few drops of LOCA for several hours. If this isn’t done, the specimens look fine at first but then later develop lacunae. I think what happens is that after the mountant is set with UV light, any alcohol that remains trapped with the insect diffuse into the LOCA leaving a vapour-filled hole. I note that LOCA is available in at least two grades, TP-2500 and TP-1000. If I am right about the cause of the lacunae it may be better to use the lower viscosity TP-1000. I only have TP-2500 so I have not been able to test this hypothesis.
I was fortunate to be given some Euparal (thank you Carel!) that was for decades the preferred mountant for insect material. It is possible to mount specimens in it directly from 70% alcohol. However, I chose to mount them from 100% alcohol. In order to accommodate specimens of the size of mosquitoes, I 3D-printed some rings with a recess in the top designed to take 19mm round cover-slips. I glued the rings to the slide with LOCA by smearing some on an old slide and then rotating the spacer ring in it before putting it on a slide and setting it with UV light. I also 3D-printed a centering template (see figure below). The Eurparal worked very well producing nice clear specimens the clarity of which improved over the few day after mounting. Contrary to the normal practice of placing the specimen on the slide and adding a drop of mountant, I found it best to put a drop of Euparal on the slide and then place the specimen on top of it before placing a second dollop on that. I nudged any bubbles out of the way with a fine needle and then lowered the cover-slip into place. Because it tends to move, centering the specimen is tricky. I have seen suggestions to let the first drop of mountant harden for some time before completing the mounting but I haven’t tried this. I discovered that after cover-slipping annoying bubbles could be convinced to move away by titling the slide. I leave the completed slide on a warming plate for several days – Euparal is slow to harden but I have found the mounts safe to store on their sides after a week or so.
So, how did it turn out? The pictures below are of a Chironomid fly and a mosquito in Euparal and a bee leg in LOCA. I learnt some interesting things about mosquitoes. The piercing mouth parts are made up of 6 components some of which aid in penetrating skin and others of which are used to secrete saliva and pump up blood. The proboscis oscillates at 15Hz which further improves its ability to force its way through the skin. Only female mosquitoes drink blood – they need the protein to create their eggs. Though they weigh only 2.5 milligrams, they can drink their own weight in your blood! One other fascinating thing about them is that the legs are covered in water-repellent hairs. The tarsus which is about 6mm long, can support 20 times the body weight of the mosquito. The legs combined appear to able to support 300 milligrams and it is for this reason that mosquitoes can so easily walk on water. I may write some more about the biology of mosquitoes and midges for though they are among the most annoying, and the former the most deadly, of insects, they are truly fascinating things to examine under a low power objective.
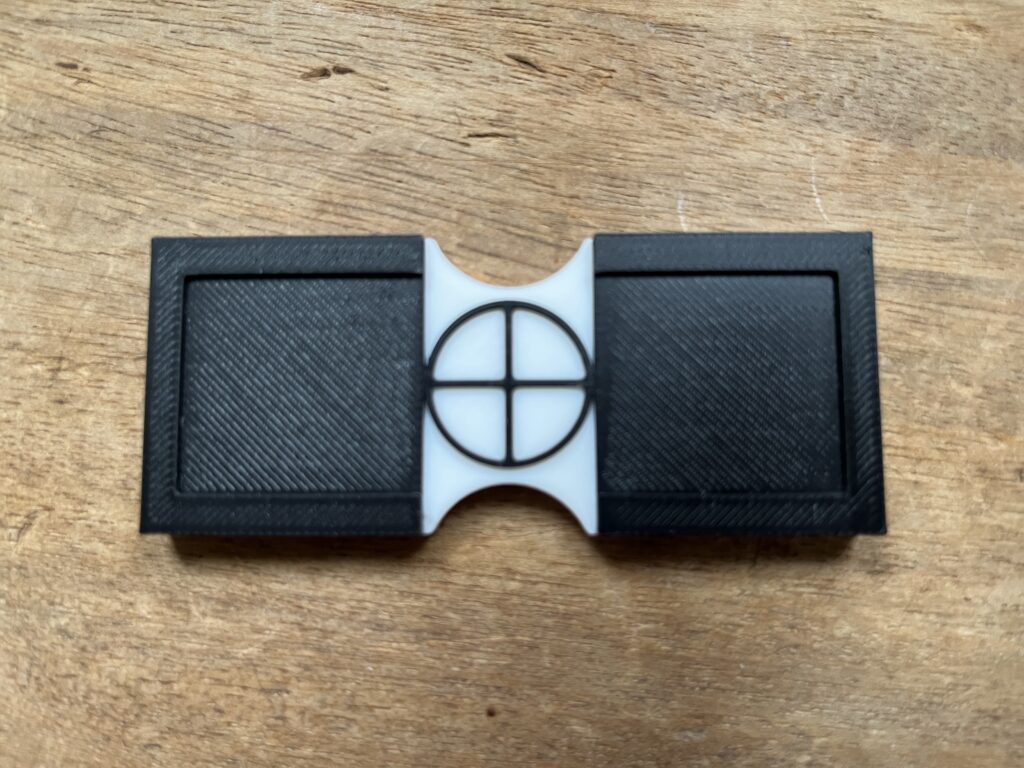
A simple 3D printed alignment tool that makes it much easier to place rings and coverslips in the centre of the slide.
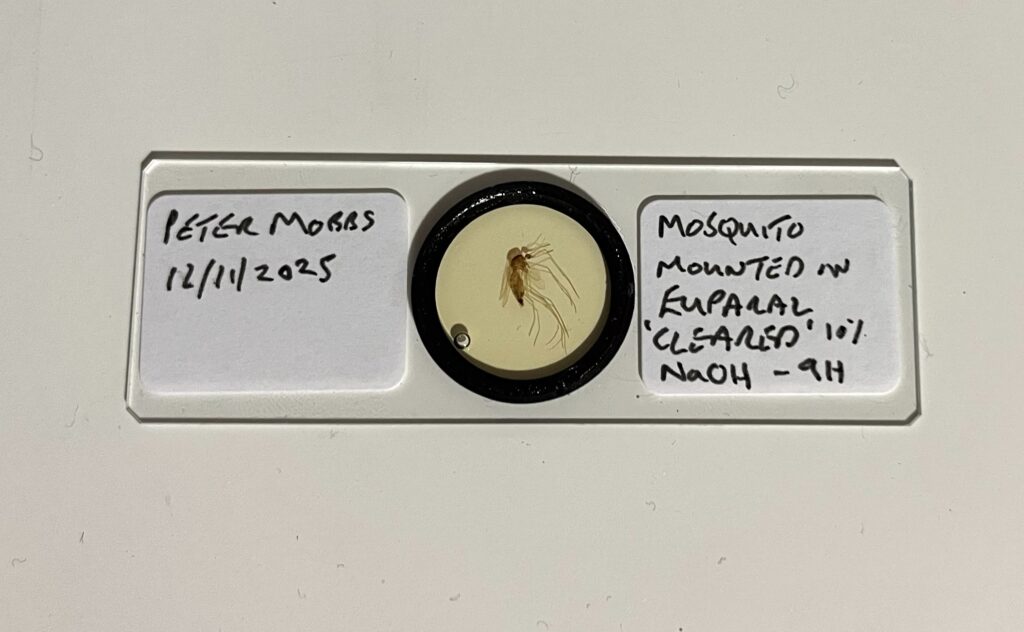
Excuse the terrible lettering! A whole mount of a mosquito in Euparal. Note the bubble. This was originally located on the specimen but was cajoled into moving out of harms way by keeping th eslide tilted at an angle.
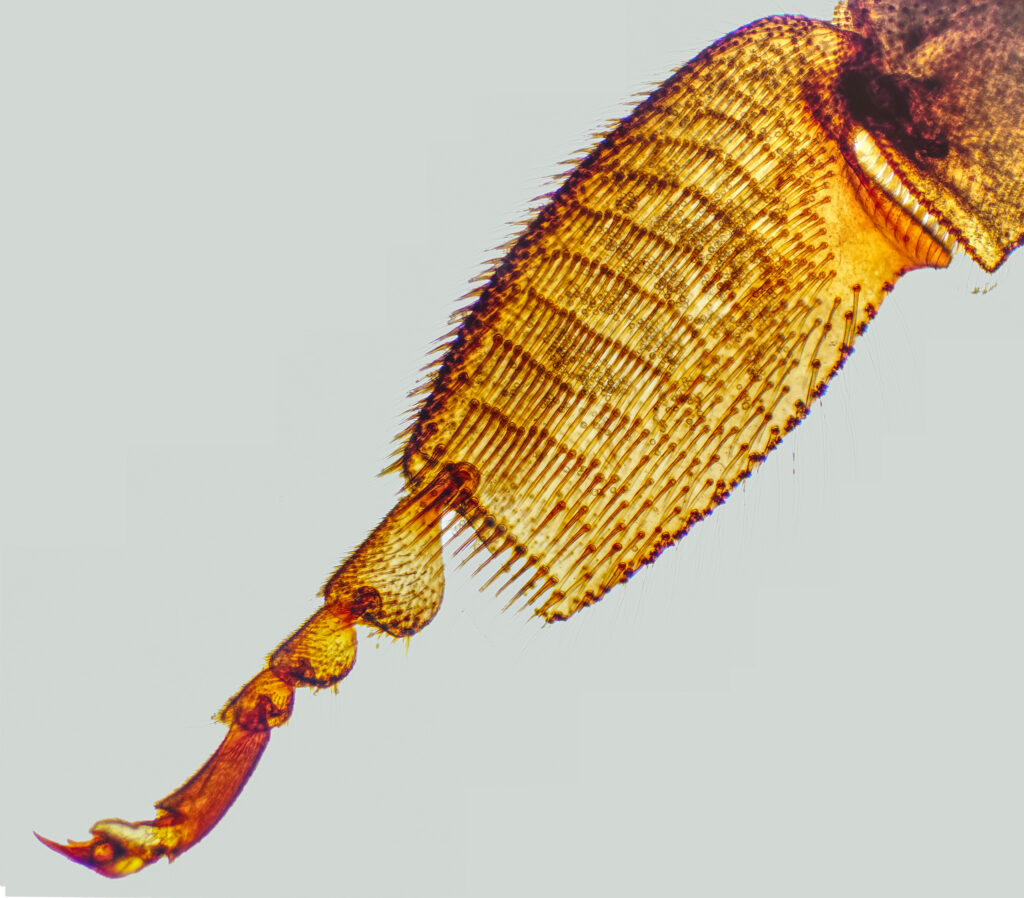
Bee hind leg mounted in LOCA. This a reduced version of a panorama made up of 11 individual shots. Not shown – the top part of the leg contained a lacuna and this after two hours of heating to drive off the alcohol. However, this the lower part is really quite nice.
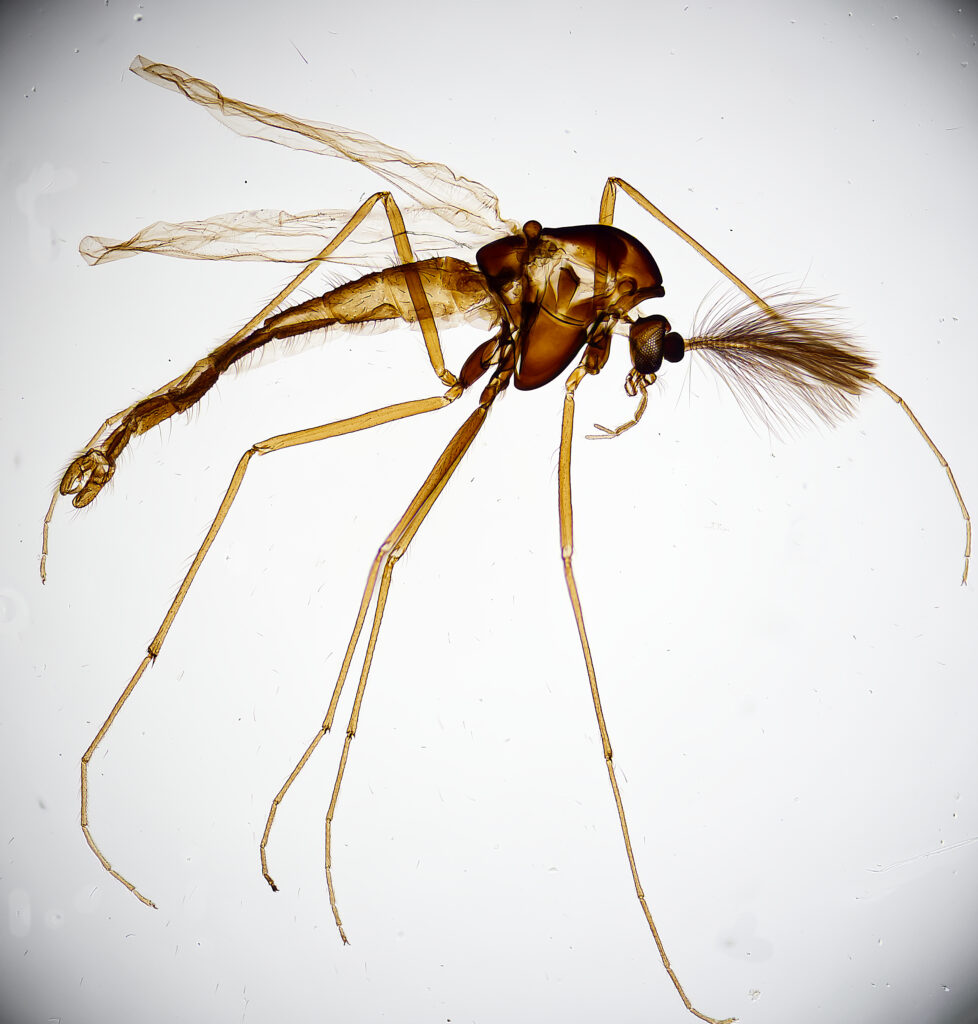
I think this is a midge called Chironomous plumosus. The wings and the body have suffered somewhat during its processing but I think it still makes a fine slide. The antennae of this male are particularly impressive. Given that these midges are dark black, the NaOH has done a fair job of making the body transparent.
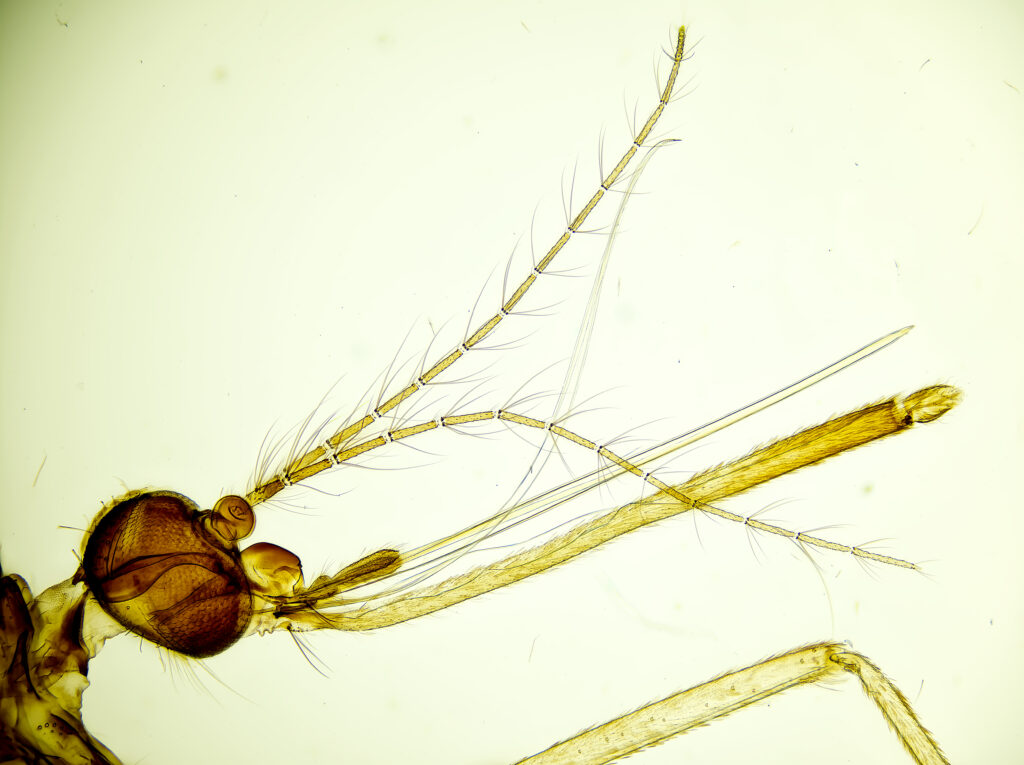
The business end of a mosquito. The mouth parts have separated – all are visible though some are amazingly fine. I am trying to find a text that describes the internal structure of the head. I find it impressive that I can so clearly see the major apodemes (muscle attachments) and other features within the head. I do not know the precise species of this mosquito but its antennae are much less hairy than others and it is quite large – 12mm from the tip of the head to the end of the rear legs. It just about fits within my 19mm cover-slip and the ring.
A PS: I have now managed to cure the vignetting caused by using my micro 4/3rds camera on the Bresser where it expects the smaller sensor of a C-mount video camera – I made my own condenser for low power objectives that spreads the light sufficiently to do away with dark corners. Perhaps I’ll do a post on this and other modifications…
Leave a Reply